Custom Items and Textures
Description
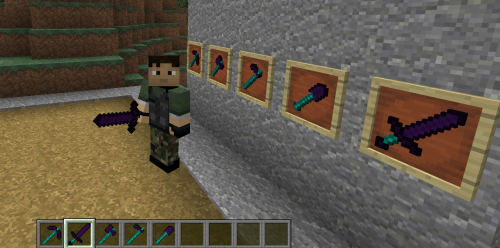
This plug-in allows the owners and developers of servers to create custom items with their own textures. (It requires a server resource pack.) This is the second release of the plug-in, so there aren't many features. Everyone who would like to use this plug-in needs to download the Editor and use that to create their own custom item set.
Discord server
Invite link: https://discordapp.com/invite/bmF3Zvu
Features
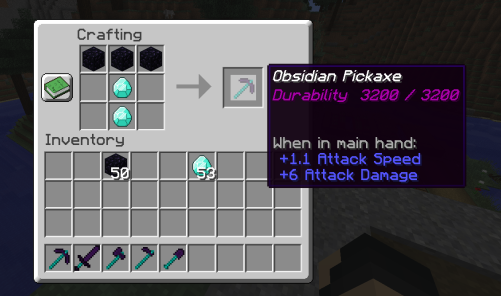
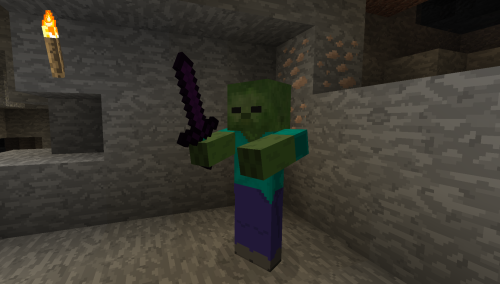
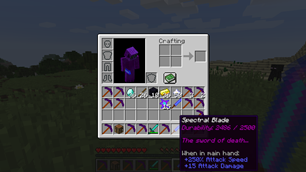
-Custom items with their own display name, lore, attribute modifiers and textures
-Custom tools with their own damage and durability
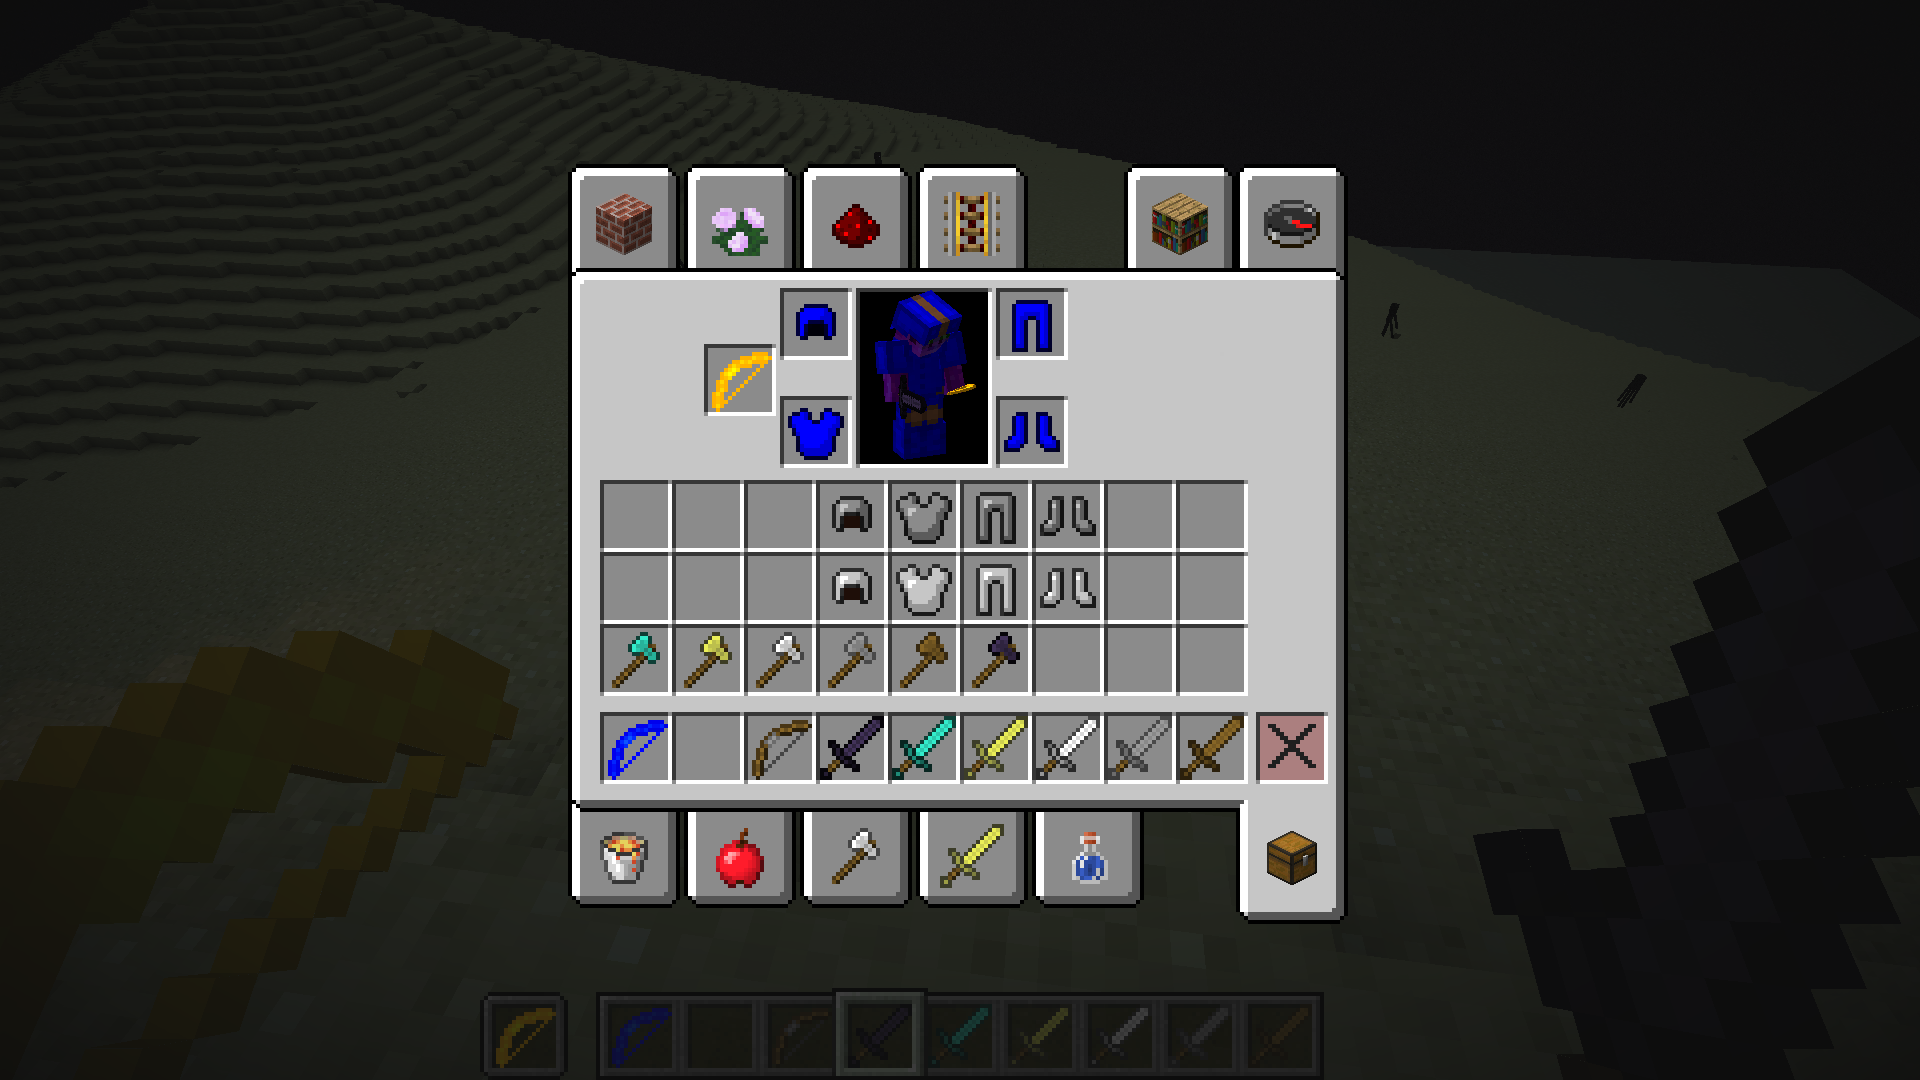
-Custom bows with their own damage, speed and durability
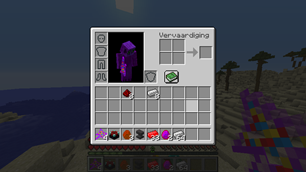
-Custom armor with their own armor value and other attribute modifiers, unfortunately without model texture.
-Crafting recipes that can use vanilla ingredients and custom items (or combined)
Commands
/customitems give to give the custom item with that name to the specified player. This is mostly a test command and can only be used by server operators. It might be useful for unique items so that there is only 1 in your entire server.
Tutorial:
https://knokko.github.io/custom%20items/index.html
Editor
Because it would be quite complex to implement all features of this plug-in by hand, I created an editor that you can use to create your custom items. I know the editor isn't beautiful, but it should be functional. A longer guide for the editor is at the next section, but I will give a quick summary here:
You can download Editor.jar from the Files section. You can put the downloaded file anywhere on your computer, but I recommend putting it in the same folder where you want to put your custom item textures.
To use the editor, double click on it after you put it somewhere on your computer. It should open a window where you can create your custom item set. Click on 'New item set' and choose a name for your item set. The name will not be shown to any players on your server, but is only for yourself to keep track of which set contains what.
A quick overview:
The quit button will exit the editor without saving your changes.
The save button will save your changes (more about this later).
The save and exit button will save your changes and exit the editor thereafter.
The export button will generate the custom item set and the resource pack (more about this later). It will also save your changes and exit the editor.
The textures button lets you add textures. You need to create a texture before creating a custom item.
(The textures will be less ugly in game, but are ugly in the editor).
The item buttons lets you view and add your items.
The recipes lets you view and edit your crafting recipes.
Once you have created the custom item set you would like to use, click on the export button. There should be a folder named 'Custom Item Sets' somewhere in your documents. It should contain the files NAME.cisb, NAME.cis and NAME.zip.
The NAME.cisb is used only be the editor, it will save its changes to this file.
The NAME.cis is the Custom Item Set that should be read by the plug-in. You need to move it to YOUR_SERVER_PATH/plugins/CustomItems/NAME.cis
Those folders will not exist the first time, so you will need to create them.
The NAME.zip is the resourcepack that your server needs. Minecraft allows server resourcepacks, so just use this as server resourcepack. You can use a website like minepack.net to put the resource pack.
Full Editor Guide
The Editor has quite some pages. Don't bother reading this whole guide. Just press 'f' while holding the control key to search for a page you would like to know the details about if you are stuck somewhere.
Main menu
When you open the editor, you will see the main menu. It only has 3 buttons:
New item set, Edit item set and Exit editor.
When you click on New item set, you will go to the create menu.
When you click on Edit item set, you will go to the load menu.
When you click on Exit editor, the editor will close itself.
Create menu
In the create menu, you should see 2 buttons and a text field. You should enter the name of your item set in the text field. The name of your item set doesn't really matter because it will not be visible in minecraft. The only point of the name is too separate different item sets. Since you can only use 1 item set per server, you probably won't need more than 1. The name of your item set must be a valid file name, so don't use any annoying tokens.
The create menu has a Cancel button and a Create button.
The Cancel button will bring you back to the main menu.
The Create button will check if the name you chose for the item set is ok and bring you to the overview menu if everything is fine.
Load menu
In the load menu, you should see at least 3 buttons: The Cancel button, the Load back-up button and the Refresh button. Also, you should see a button for every item set that is stored on your computer. So you won't see anything the first time you use the editor because you need to create an item set first.
The Cancel button will bring you back to the main menu.
The Load back-up button will bring you to the load back-up menu.
The Refresh button will search for item sets again. You probably won't need this at all.
Any other button will bring you to the overview menu for the specified item set.
Load back-up menu
In this menu, you should see at least 2 buttons: the Cancel button and the Refresh button. You should also see a button for every time you saved an item set containing the time and name of the item set.
The Cancel button will bring you back to the load menu.
The Refresh button will look for back-ups again. You should rarely need this method, if you need it ever.
All other buttons will load the item set that was saved at the shown time and bring you to the overview menu for that item set. If you save the back-up, the item set in the load menu will be replaced with the back-up. You should always be able to find the saved item set back in this menu.
Overview menu
The overview menu is the base page of editing an item set. Both the create menu and the load menu will bring you to this page.
You should see 8 buttons: Quit, Save, Save and quit, Export, Textures, Items and Recipes.
The Quit button will close your edit sesion for the current item set without saving any changes. It will then bring you back to the main menu.
The Save button will save the changes you have made to the item set. You will see a red error at the top of the screen if anything went wrong. If everything was fine, you won't see anything change. Your item set will be stored in the file itemsetname.cisb in a folder named 'Custom Item Sets' in your computer documents.
The Save and quit button will save any changes you have made. If anything went wrong, you will stay in the overview menu and a red message in the top of your screen will tell you what went wrong. If nothing went wrong, you will be brought to the main menu.
The Export button will save any changes you made, but also create 2 extra files. It will create a file named itemsetname.cis and itemsetname.zip. Just like the file itemsetname.cisb that is created during saving, the files will be stored in the folder named 'Custom Item Sets' in your computer documents. The file itemsetname.cis is the file that should be loaded by the minecraft plug-in. You should move that file to plugins/CustomItems/itemsetname.cis. The file itemsetname.zip is your resourcepack. You should put it somewhere on the internet, for instance minepack.net and put the address of the resourcepack in your server.properties file. If it is just for testing, you could also use it as a normal resourcepack.
The Textures button will bring you to the texture menu.
The Items button will bring you to the items menu.
The Recipes button will bring you to the recipes menu.
Texture menu
The texture menu is the overview of textures that has been loaded in the current item set. You can not use any textures before you load them here, so load the texture of the item before creating the item itself. You should see at least a Back button and a Create texture button. If you have loaded any textures, you will also see a list of all those textures. If there are many textures, you can scroll with your mouse wheel or the arrow keys to view them all.
The Back button will bring you back to the overview menu.
The Load texture button will bring you to the texture creation menu.
If you have loaded any textures before, you will see an Edit button and a Delete button for every loaded texture.
The Edit button will bring you to the texture edit menu for the specified texture.
The Delete button will remove the texture from the loaded textures. This will not delete the texture from your computer though.
Texture creation menu
In this menu, you should see 3 buttons.
The Back button will bring you back to the texture menu.
The Create simple texture button will bring you to the Texture edit menu.
The Create bow texture button will bring you to the Bow texture edit menu.
Texture edit menu
The texture edit menu has 3 buttons and a text field.
The Cancel button will bring you back to the texture menu. If you were editing a texture, the changes will not be kept.
The Edit... button will let you select an image from your computers file system.
You should enter the name of the texture you are loading in the text edit field. The name itself will not be visible in minecraft, but it will be used within the resourcepack. It would be wise not to use any special tokens in the name.
If you are creating a new texture, you will see the Create button. This button will add the chosen texture to the item set. The chosen image will be copied, so any changes to it after loading it will not affect the item set. If everything went well, you will be brought to the texture overview. If anything went wrong, you will see a red error at the top of the screen explaining why it went wrong.
If you are editing an existing texture, you will see the Save button. This button will change the name and image of the selected texture to the name and image specified in this menu. Notice: this button will not save anything definitely yet, only the buttons in the overview menu can do that. If everything goes well, you will be brought back to the texture overview. If not, you will see a red error message at the top of the screen that explains why it couldn't change the texture.
Bow texture edit menu
In this menu, you can create bow textures. Bow textures have a base/standby texture and textures for different pulling states.
The Cancel button will bring you back to the texture overview menu.
The Add pull button will add a new pull texture to the menu. You can then select the texture and pull for the new pull texture.
If you are creating a new bow texture, you should see a Create button. If you are editing a bow texture, you should see an Apply button. These buttons will save your changes and bring you back to the texture overview.
You should see an Edit... button right after 'Base texture:'. That button will let you select the base/standby texture of the bow texture. That is the texture you see while you are not pulling the bow.
You should also see a text field where you can type the name of the bow texture. The name should not contain any special characters to prevent resourcepack trouble. The players won't see the name of the bow texture anyway.
On the right of the screen, you should see 3 pull textures (or more if you clicked on the Add pull button). Every pull texture has a texture and a pull. The texture is the texture players will see while they are pulling the bow and have reached the pull of the pull texture. The pull value determines how long it will take before players see that texture. It is a number between 0 and 1 where 1 is the pull for when a player can't pull the bow any further and where 0 is the texture for when the player just started pulling. By default, you should see 0.0, 0.65 and 0.90. These are the pulls the normal minecraft bow has. The corresponding minecraft textures are bow_pulling_0 for 0.0, bow_pulling_1 for 0.65 and bow_pulling_2 for 0.9.
Use the edit button for every pull texture to choose the texture. Click on the red cross to remove the pull texture completely.
Item overview
The item overview should remind you of the texture overview. If you didn't see the texture overview yet, you really should because you can't add items before having loaded a texture!
The Back button should bring you back to the overview menu.
The Create item button should bring you to the item creation menu.
If you have created any custom items before, you will also see an Edit button and Delete button for every custom item.
The Edit button will bring you to the edit menu for the specified item. More complex items will bring you to different edit menus.
The Delete button will delete the specified item if possible. If it's not possible, a red message in the top of your screen will tell you why.
Item creation menu
The item creation menu has a Cancel button and a button for every type of custom item that is supported.
The Cancel button will bring you back to the item overview.
Every other button will bring you to the item edit menu for the specified custom item type. There, you can actually create the custom item.
Simple item edit menu
This is the most simple item edit menu. Every other item edit menu will contain the buttons of this menu, but some more buttons.
On the left of the screen, you should see the Cancel button and the Create button or Apply button.
The Cancel button will bring you back to the item overview.
The Create button will try to add the item to the item set. If you can't add the item, a red message in the top of your screen will tell you why.
The Apply button will try to apply the changes to the item you are editing. If the changes can't be applied, a red message in the top of your screen will tell you why.
You should enter the name of the item in the text field on the right of 'Name:'. This name will not be visible to players, that's what the display name is for. The name of the item should not contain any special tokens. Doing it anyway might give problems with the resourcepack. It's no big problem if this happens, you can just change the name of the item later and export again.
Below the name, you have the internal item type. Below the internal item type, you have the internal item damage. The type and damage do not really matter for simple custom items, as long as there are not 2 custom items with the same type and damage. The damage should be an integer that is not greater than the maximum durability of the internal item type.
Under the internal item damage, you can enter the display name of the item. This is the name that will be shown to everyone who has the item in their inventory. I will figure something out for color codes later...
The Change lore... button will bring you to the lore menu for this item.
The Change attributes... button will bring you to the attributes menu for this item.
Under Change attributes... is the texture button. The text on the button will be the name of the current texture or 'None' if there is no current texture. Clicking on the button will bring you to the texture select for this item.
Lore menu
If you thought the editor couldn't get any more ugly, you were wrong. The lore menu is probably the most horrible looking menu in the editor.
It should have at least the Cancel button and the Apply button.
The Cancel button will bring you back to the item edit menu without keeping the changes you made in the lore.
The Apply button will bring you back to the item edit menu and keep the changes you made in this menu.
Aside from those buttons, you should see a text edit field for every line of lore the item currently has. By default, there are the lines 'First line' and 'Second line'. On the right of every line, you have a red button that will remove the line and a green button that will insert a new line at the position of that line.
Attributes menu
The attributes menu should have at least a Cancel button, a new attribute button and an Apply button.
The Cancel button will bring you back to the item edit menu without keeping the changes you have made in this menu.
The Apply button will bring you back to the item edit menu and keep the changes you have made in this menu.
The New attribute button will add a new default attribute modifier.
For every attribute modifier, you should have 4 buttons and a text field.
The red button on the left will remove the attribute modifier.
The button on the right of the red button allows you to change the attribute of the attribute modifier. The button text is the name of the current attribute modifier.
The button on the right of the attribute button is the slot button. The slot determines when the attribute modifiers of the item will be enabled. The default value mainhand means that the attribute modifiers will only work if a player holds the item in his main hand. You can click on the button to change the slot.
The most right button is the operation button. In minecraft, every attribute modifiers has 1 of the operations: add, multiply and chain multiply. The text of the button is the current operation. Click on the button to change the operation. The add operation means that the value of the attribute will be added to the attribute value of the player. The multiply operation means that the value of the attribute will be multiplied with the value of the player. The chain multiply operation means that the value of the attribute will be multiplied with the value of the player and the value of every other attribute modifier with the same attribute.
You should insert the value of the attribute modifier in the text edit field on the right.
Texture select
The texture select should have at least the Cancel button. This button will bring you back to the item edit menu. If you haven't added any textures in the texture menu, this page will be empty mostly.
Otherwise, you will see all textures you have added in the texture menu. If you have many textures, you can scroll with the mouse scroll wheel or with the arrow keys. Click on the name of the texture to select that texture. Selecting a texture will bring you back to the item edit menu. It is allowed to give multiple items the same texture, but I would only do that for testing.
Tool item edit menu
This menu is the item edit menu for tools. It contains all buttons and text fields of the simple item edit menu, but more.
Most for the simple item buttons remains the same, except for the internal item type. For custom tools, the internal item type actually matters! The type determines the block break speed and the enchantibility of the tool. The block break speed and enchantibility will be the same as the block break speed of the internal item. The enchantibility determines how likely players are too get nice enchantments on the tool. This is just normal minecraft behavior not many people know about because most people only enchant diamond tools.
The internal item type does not matter for the attack damage and the maximum uses of the item. You can choose the attack damage with the attribute modifiers and you can use the max uses edit field for maximum uses.
Aside from the buttons from the simple item edit menu, you will also see a checkbox for 'Allow enchanting' and an edit field for the maximum uses of the tool.
If you check Allow enchanting, players will be able to enchant the custom tool like a normal tool. If you don't check it, players will not be able to enchant the custom tool.
The Max uses is the amount of times players can use your custom tool before it breaks. This number should be -1 or an integer between 1 and 2,14 billion. If the value is -1, the tool will be unbreakable. Otherwise, the number will be equal to the amount of times players can use the item before it breaks.
Bow item edit menu
This menu is much like the tool item edit menu, but has more options.
The damage multiplier determines how much damage this bow will deal compared to a normal bow. A damage multiplier of 0.5 means half of the damage and a damage multiplier of 2.0 means twice the damage of a normal bow.
The speed multiplier determines how fast arrows will fly right after they are fired, compared to normal bows. A speed multiplier of 0.5 means arrows will fly twice as slow right after they are launched. A speed multiplier of 2.0 means arrows will fly twice as fast as arrows shot by a normal bow. Keep in mind that faster arrows will deal more damage, so a custom bow with a large speed multiplier will also deal more damage!
The knockback strength determines the extra knockback that arrows fired by this bow will give. A knockback strength of 0 will give the same knockback as a normal bow. A knockback strength of 1 will give the arrows fired by your bow the same knockback as arrows fired by a normal bow with the knockback I enchantment. If your bow also has the knockback enchantment, the knockback will be even more.
If you uncheck the arrow gravity, the arrows fired by your bow will ignore gravity and thus fly straight at the point the player aimed it. If you keep it checked, the arrows fired by your bow will fly like normal arrows.
Recipe overview
You should see at least 3 buttons: Back, Create shaped recipe and Create shapeless recipe.
Aside from those buttons, you should also see an Edit button and a Delete button for every recipe you have already added. (So no buttons if you didn't add any recipes so far.)
The Back button will bring you back to the overview menu.
The Create shaped recipe button will bring you to the shaped recipe edit menu where you can create a new recipe.
The Create shapeless recipe button will bring you to the shapeless recipe edit menu where you can create a new recipe.
Every Delete button will delete the corresponding recipe immediathly.
Every Edit button will bring you to the recipe edit menu for that recipe.
Shaped recipe edit menu
On the top left of the screen, you should see a Cancel button and an Apply button. Below those buttons, you should see 3 x 3 buttons. Those buttons represent the ingredients of the recipe. On the right of those buttons, you should see the button for the crafting result. The text of the ingredient buttons and the result button represents the current ingredient or result.
The Cancel button will bring you back to the recipe overview without keeping changes you made to the recipe.
The Apply button will bring you back to the recipe overview and keep changes you made to the recipe.
Clicking on one of the ingredient buttons will bring you to the ingredient view for that ingredient.
Clicking on the result button will bring you to the result view where you can view and edit the result of the recipe.
Shapeless recipe edit
This menu has at least 3 buttons: the Cancel button, the Add ingredient button and the Result button. The result button is on the right and the text represents the current result.
The Cancel button will bring you back to the recipe overview without keeping changes you made or adding the actual recipe.
The Add ingredient button will bring you to the ingredient select menu where you can choose the ingredient.
The Result button will bring you to the result view where you can view and edit the result of the recipe.
After you add at least 1 ingredient, the Apply button will appear. This will keep the changes to the recipe you were editing or create a new recipe if you were creating one.
Ingredient view
This menu contains 2 buttons: the Back button and the Change button. You should also see some information about the current ingredient. You will just see 'empty' if there is currently no ingredient at that place.
The Back button will bring you back to the recipe edit menu.
The Change button will bring you to the ingredient select menu.
Ingredient select menu
This menu should have at least the Cancel button, the Custom Item button, the Simple vanilla item button and the Vanilla item with datavalue button. If you came from the shaped recipe edit menu, you will also see the Empty button.
The Cancel button will bring you back to the recipe edit menu.
The Custom Item button will bring you to the custom item select.
The Simple vanilla item will bring you to the simple vanilla item select.
The Vanilla item with datavalue will bring you to the data vanilla item select.
The Empty button will set the ingredient at the current spot to empty and bring you back to the shaped recipe edit menu.
Custom item select
This menu should have a Cancel button and a button for every custom item you made so far. If you have a lot of custom items, you can scroll with the mouse wheel or with the arrow keys.
The Cancel button will bring you back to the recipe edit menu.
Every other button will set the item you were selecting for to the custom item you clicked on and return you to where you came from.
Result view
This menu has a Cancel button, a Custom items button, a Simple vanilla item button and a Vanilla item with datavalue button. It also contains an edit field for the amount.
The Cancel button will bring you back to the recipe edit menu.
The Custom Item button will bring you to the custom item select.
The Simple vanilla item will bring you to the simple vanilla item select.
The Vanilla item with datavalue will bring you to the data vanilla item select.
After you have chosen an item, the Select button will appear. Click on this button after inserting the amount of the item. The amount of the item is the amount players will get for a single craft. (Usually, you want to keep this at 1.)
Simple vanilla item select
This menu allows you to select an item or block from all the standard items and blocks of minecraft. You can scroll quickly with the mouse wheel and you can scroll slowly with the arrow keys. Clicking on any item or block will choose that item or block and bring you back to the menu you came from. The Cancel button will bring you back to the menu you came from without selecting anything.
Data vanilla item select
The data item select is almost the same as the simple vanilla item select, but it has an extra text edit field for the data value. Depending on the item you choose, the data value can have a different meaning. For blocks like wood and wool, it will depend the type of wood or the color of the wool. For tools, it determines the damage the tool has taken. But for most items, its meaningless.
If you click on an item here, you won't be returned to the previous menu immediathly, you will get the chance to change the data value and then click on the OK button that will appear after clicking on an item.
Installation
This plug-in requires Knokko Core, so you need to install that plug-in. The latest version of this plug-in usually requires the latest version of Knokko Core. This plug-in simply won't work without it.
If you want to install this plug-in for minecraft 1.12, you will need Knokko Core for 1.12 and you need to have used the 'Export' button of the Editor.
If you want to install this plug-in for minecraft 1.14, you will need Knokko Core for 1.14 and you need to have used the 'Export for 1.14' button of the Editor.
Download the plug-in from the Files section and put it in YOUR_SERVER_PATH/plugins
Create your own item set as explained in the Editor section. The plug-in can't do anything if you haven't made your own item set.
Make sure the server resourcepack is online and accessible and that the NAME.cis is in YOUR_SERVER_PATH/plugins/CustomItems (See Editor)
Source code (programmers only)
Download
| File Name | Status | Version | Downloads | Date |
|---|---|---|---|---|
| Custom Items 5.7 | R | 1.14 +2 | 267 | 01/09/2019 |
| Editor 5.6 | R | 1.14 +1 | 170 | 26/08/2019 |
| Custom Items 5.1 [1.14 problems] | B | 1.12 | 384 | 23/07/2019 |
| Custom Items and Textures 1.20.2 | Updating | 1.20.2 | Updating | Updating |
| Custom Items and Textures 1.20.1 | Updating | 1.20.1 | Updating | Updating |
| Custom Items and Textures 1.20 | Updating | 1.20 | Updating | Updating |
| Custom Items and Textures 1.19.2 | Updating | 1.19.2 | Updating | Updating |
| Custom Items and Textures 1.19.1 | Updating | 1.19.1 | Updating | Updating |
| Custom Items and Textures 1.19 | Updating | 1.19 | Updating | Updating |
| Custom Items and Textures 1.18 | Updating | 1.18 | Updating | Updating |
| Custom Items and Textures 1.17.1 | Updating | 1.17.1 | Updating | Updating |
| Custom Items and Textures Forge | Updating | Forge | Updating | Updating |
| Custom Items and Textures Fabric | Updating | Fabric | Updating | Updating |

Have you a channel youtube and want to bring your Video to quality visitors?
Do you want your video to appear on our website?
Do you want to become partner with us?
Just 3 steps to become our partner:
Step 1: Make video review for mods, addons, plugins, ... which you like
Step 2: Upload this video to youtube and our link to your video description
Step 3: Send the youtube video link via message to http://fb.com/9lifehack or leave a comment in the post. We will add your video in the our post, it will help you have more view.
JOIN to get more youtube view with us!!!!